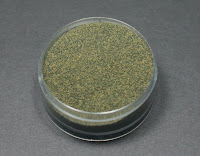
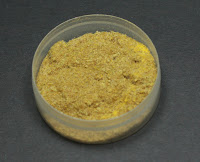
For me, basing is all about texture and layering and combining different textures to achieve a varied and natural effect. Variety is what makes life spicy (or something like that) and creating a variety of textures means you'll need a variety of materials. Here are a few of the textures from my basing drawer to give you some ideas.
Store bought textures:
Flock/turf: good for a base floor if you aren't using sand and great for adding moss (green flock
Static Grass
Chopped walnut shells: you can make these yourself or save time and buy from companies like Gale Force 9. These chopped shells have a great texture and when painted in a grey scheme look just like broken concrete.
Slate: large chunks of slate for boulders and finer chipped slate for rocks. Mixed with sand, the smaller slate adds good variety of texture.
Sand: sure, you can go grab some from the local playground, but you can also buy a big bag at your local Home Depot or Lowe's for less than three bucks. I personally prefer masonry sand because it has a finer texture, but still has some variety in size.
Wire: this is GW's barbed wire, but others make similar products. If you're like me you've got wire hanging around your tool box; if not, open up that electronic whatever next time your old clock radio breaks and scavenge all sorts of interesting bits.
Found textures:
Bark mulch: be picky with mulch and try to find chips like the above. They have a more realistic stone appearance than the shredded mulch I see in a lot of landscapes.
Seeds, seed pods: great natural elements to add as a final touch on most bases. I usually just hit them with a bit of GW wash and small light brown highlights, but different washes and highlights (Baal Red is stunning) will give you different color foliage.
Junk: this is the grab bag of extra bits you find or left over parts from battle damage that would normally end up in the vacuum. Keep a little plastic baggie around to save these scraps since you never know when you'll want to add a lopped off hand, broken bit or scrap of building to a scenic base.
Combining Elements:
Here's my basic basing mixture of masonry sand, small and large ballast (from a railroad shop), and fine slate chips. Applied with a layer of wood or white glue, this basic mix will give you a good varied texture in a short amount of time.
Here I've used the basic mix on a flying base and finished it off with some static grass. This is about as simple as I go on my bases since it doesn't really have a "wow" factor, but provides good results in a short time if you are working on the rank and file troops for an army.
For more advanced basing I usually start with a blob of epoxy putty
This 40mm base combines large pieces of slate, my basic mix and a few Marine bits. Less is more when it comes to basing. A whole Marine model would crowd the base and draw attention away from the actual model I'm putting on the base. A helmet, a weapon or a piece of a body are all that you need. I always try to put the cut-end of my bits at the edge of the base so that you can imagine the rest of the body is laying out of "view".
Here's a group of objective markers I've created by combining several basing materials. These started with plain sand and I added chopped walnut shells and fine slate to give them a "rubbly" appearance. There were finished off with a few bits from the Citadel basing kit, a few birch seeds as leaves and a little green flock for a color contrast.
The crate objective marker is a scrap of pink foam glued to a 40mm base and then carved to fit the crate and covered with some plain sand. The texture of the foam gives it a nice stone look while the sand on top softens the hard texture. A little gloss medium for mud and light snow was added to match the snow bases of my Black Templars army.
This is another slate base shaped to look like the bases found on some of the newer Eldar Exarchs and HQs. Because this model needed some extra height, I used putty to lift the whole surface up and pressed small slate flake into the putty sides for a rocky appearance. A small bit of a banner was added to the front and a little green static grass
Remember that less is more: you don't want the base to overpower or take attention away from your model. If your base is too bright, a wash of Badab Black or Devlin Mud does a good job of toning things down. Also be sure to not add too much in the way of bits. You don't want your model to look like he's walking through your bits box! Small bases are easily crowded so my rule for bits is one per 25mm base and two per 40mm base.
Remember that you don't need to go out and buy a bunch of basing materials. The content of your bits box, the debris under your modeling table and items you can find around the house and yard can give you impressive results. I hope you've found a few ideas to put into your next basing project.
What interesting found materials have you used on your scenic bases?


0 comments: